5 MILLION GALAXIES:
Creating a 3-Dimensional Model of the Universe
Creating a 3-Dimensional Model of the Universe
Written by Bill Eberly
Hi everyone, I’m Bill Eberly, I’m a software engineer and I’ve been a volunteer on In Saturn’s Rings for almost four years now. Along with a few other volunteers I have been working to create an accurate photographic three-dimensional model of the northern hemisphere sky from outside of our solar system. This model will be used during the “fly through the universe” sequence of the film, where we’ll “fly” through galaxies and nebula as the universe is expanding.
I joined the team in early 2014, just after the Kickstarter campaign had ended. By the time I had found out about the film, it had already met its funding goals, and since I had read that it was being put together by volunteers, I decided to reach out and see if I could help.
When I first met Stephen, the film’s director, and learned what he was trying to accomplish with this opening scene, I really had no idea what I was about to get myself into. At the time I had absolutely no experience working in the film industry, no experience with Adobe After Effects, and other than the Hubble images I had as the wallpaper on my PC, no experience with astronomical imaging. Needless to say, my work on this film has been a very challenging and a massive learning experience, but also incredibly fun, rewarding, and humbling.
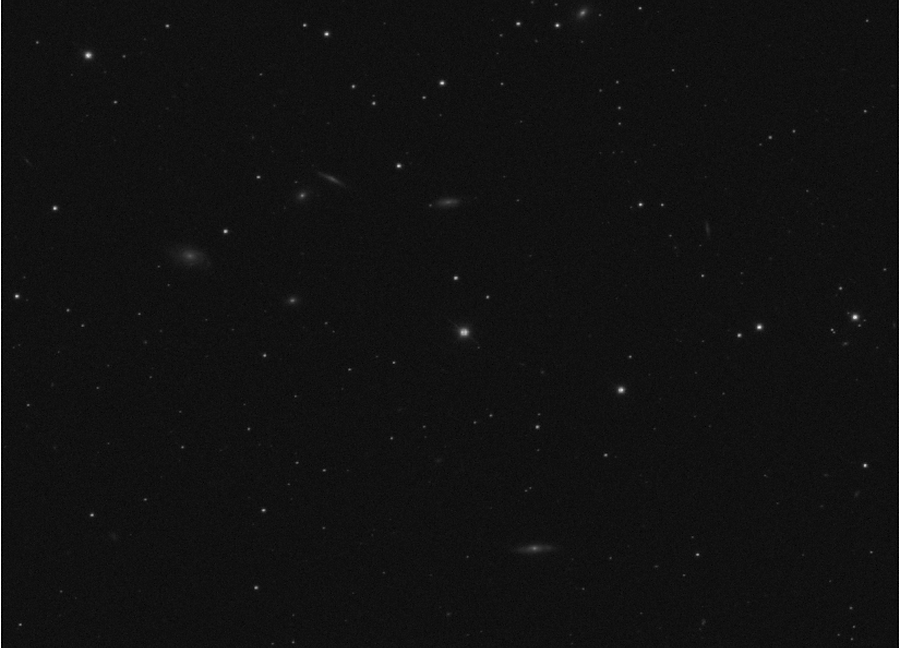
To build our photographic model of the universe, we wanted to use images from the Sloan Digital Sky Survey, or SDSS for short. This survey has photographed a large portion of the northern hemisphere’s sky. It consists of 938,046 image tiles, which contain over 200 million galaxies. Each tile looks something like this:
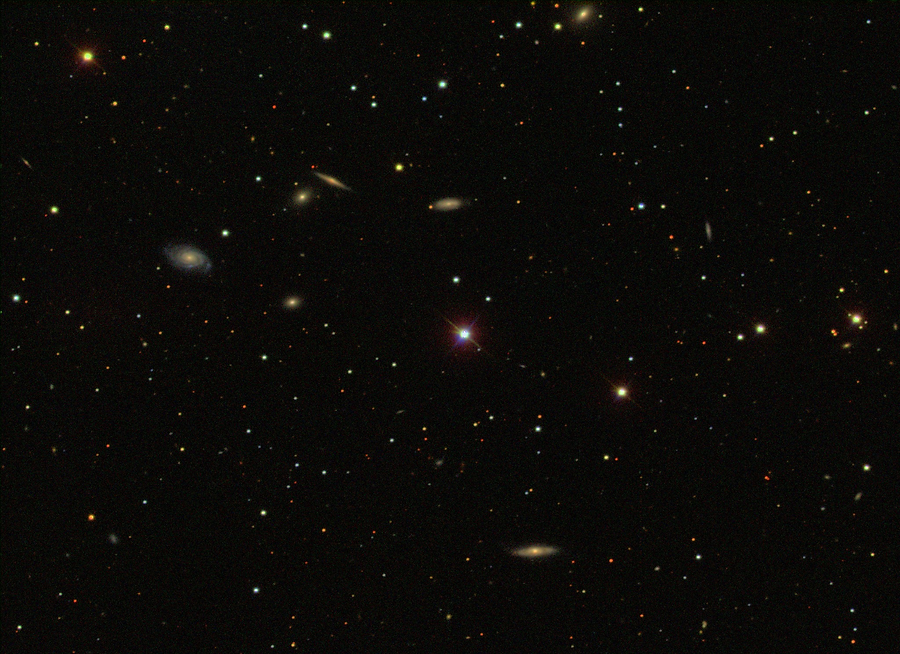
If we simply wanted to see what the night sky looked like from earth, we could simply take all of these images, arrange them correctly, and point the camera at them. But we don’t just want to see what the universe looks like from earth, we want to fly though it! To make things more complicated, we wanted to fly through space outside of the Milky Way, so we had to remove all of the individual Milky Way stars from our data.
In the process of taking nearly a million flat images and trying to turn them into an accurate model, we ran into several problems we had to solve:
1. Determining the distance from earth for each galaxy
2. Visualizing the shots – where will there be usable data that we can see?
3. Downloading the image tiles, extracting the galaxies, and tagging them with metadata
4. Determining how large to make each galaxy
5. Arranging them in three-dimensional space
6. Removing local Milky Way stars, satellite and aircraft trails, and other artifacts
7. Pulling this huge amount of data into Adobe After Effects in a manageable way
When you don’t truly understand the depths of these problems, or if you’re already an expert in math, astronomy, or filmmaking, they might not seem seem that hard. Having no experience in any of these areas, I fell into the first group. My line of thinking was something along the lines of “We’ll use some object detection to find all of the galaxies and ignore the stars, then use the SDSS data to determine where they go, and then shove all of the images into After Effects. Easy!” As it turned out, I had the right idea, but vastly underestimated how complex it was to actually do any of that.
The first thing we needed to do was determine how far away these galaxies were. SDSS tags each galaxy with the Right Ascension and Declination, which tells you where in the sky something is when you’re standing on earth, but not how far away each galaxy is. To determine the distance to a galaxy, astronomers use spectroscopy to find the “redshift” of a galaxy by analyzing how the wavelengths of light emitting from the galaxy are shifted. This lets them determine how fast a galaxy is moving, which then allows us to calculate its distance from earth.
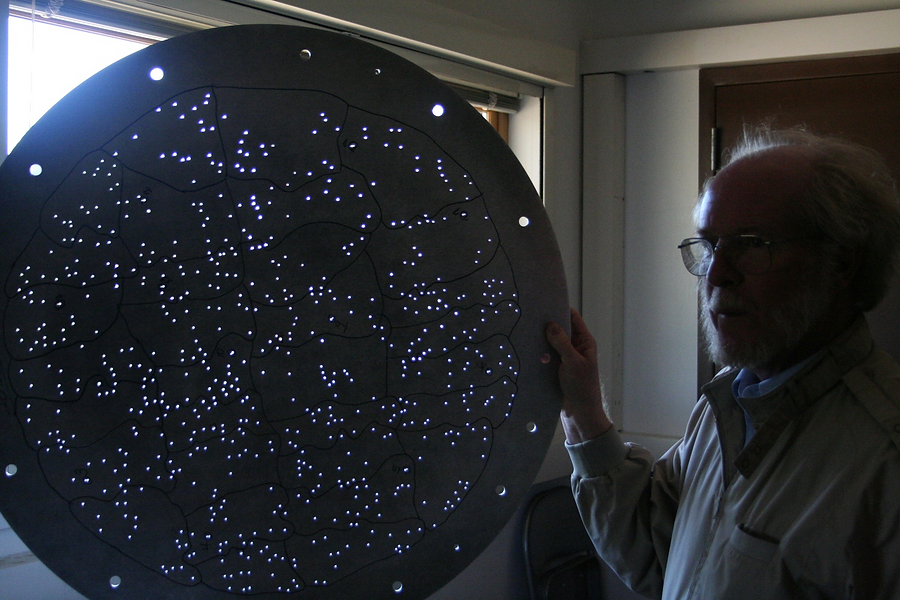
But obtaining the redshift data for a large number of galaxies is a huge undertaking. SDSS has images of 200 million galaxies, but only has a spectrum analysis for a small percentage of those. This is due to the fact that obtaining the spectroscopic data involves drilling holes in a large aluminum plate, and manually plugging all 640 holes with a fiber optic sensor. The plate is mounted on the telescope to perform the spectroscopic observation of all 640 objects at once.
Since there is only a small set of spectroscopic data available, scientists have attempted to extrapolate this data to estimate the redshift of 78 million more galaxies in the SDSS data set. This additional estimated data gives a huge number of galaxies we can add to our model of the universe.
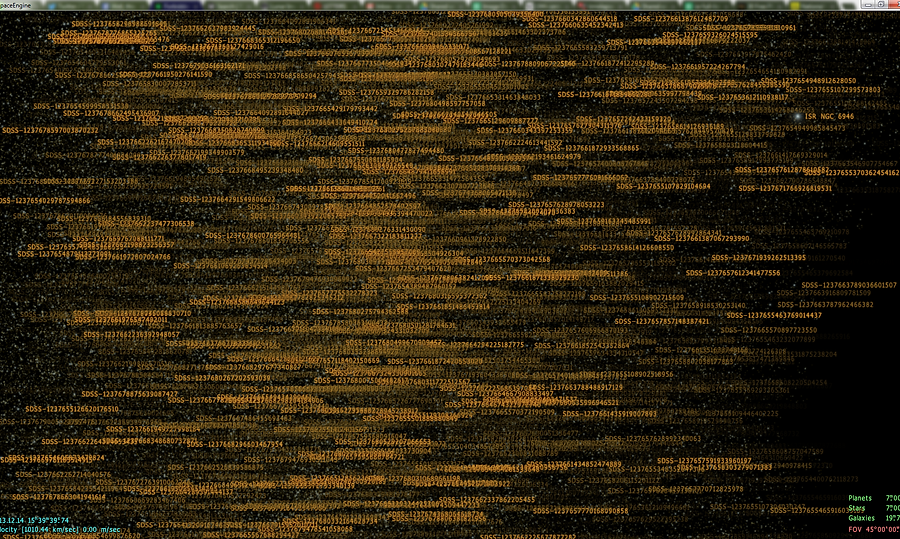
Once we knew where all of these galaxies were, we needed to come up with a way to easily visualize them so that we could plan the shots for the film. The galaxies from SDSS would be used as background images while we’re flying through the universe and doing close up shots on some very high resolution images of galaxies and nebulae taken from the Hubble Space Telescope and other sources. In order for those shots to work, we needed SDSS galaxies to be visible when the camera was pointed at the primary object. We found that Space Engine, a 3D astronomy program, allows you to import custom catalogs of galaxies and stars that you can view and fly though. This was exactly what we needed to plan our shots.
I took the data from the SDSS data files and used it to build custom Space Engine catalogs that we could use to view the data. These catalogs with all 78 million galaxies crashed Space Engine, as it simply couldn’t support the amount of data we had. After trimming the catalogs down to only display 10% of the SDSS data, we were finally able to get it to load. Even with a fraction of the data, what we saw was overwhelming.
With the data loaded in Space Engine, we were able to determine which galaxies we could fly though while having the SDSS data in the background. We built out our list of shots and moved on to retrieving and processing the image tiles.
The next step to building our 3-dimensional model of the universe was to obtain the image tiles, cut the galaxies out of them, and tag them with their location in the sky, so that we could put each galaxy in its right place. SDSS makes all of their images and data files available to download on their website, so we were able to write a program that would download the images and the data files for each section of SDSS data that we needed.
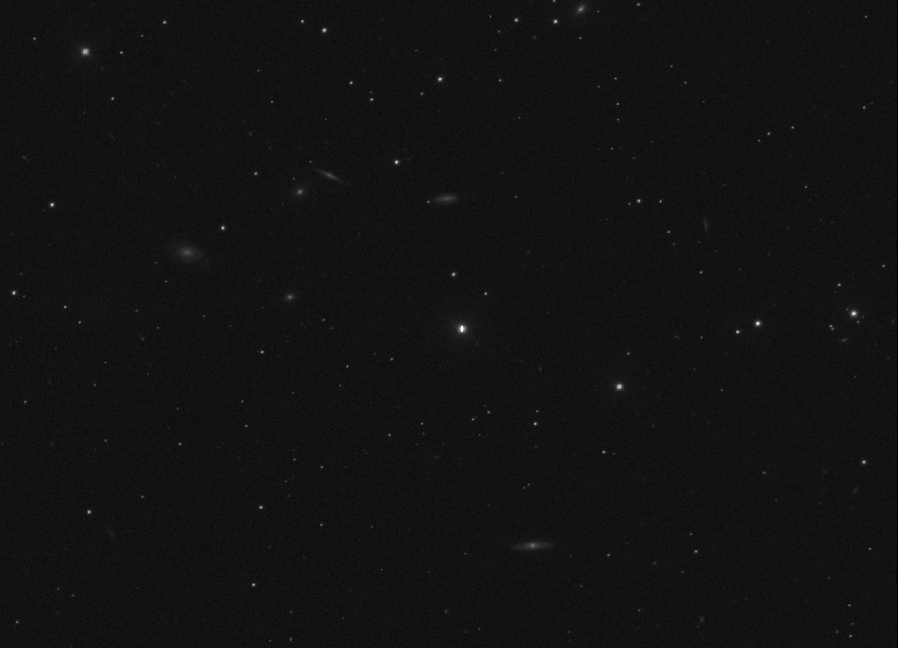
As with most other types of astronomical images, the SDSS camera doesn’t simply give you a single image, but takes multiple images at different wavelengths. When you look at one of these images, you see the intensity of a single color represented in black and white. For example, here is what the SDSS tile we saw earlier looks like in three different wavelengths:
INFRARED NEAR
RED
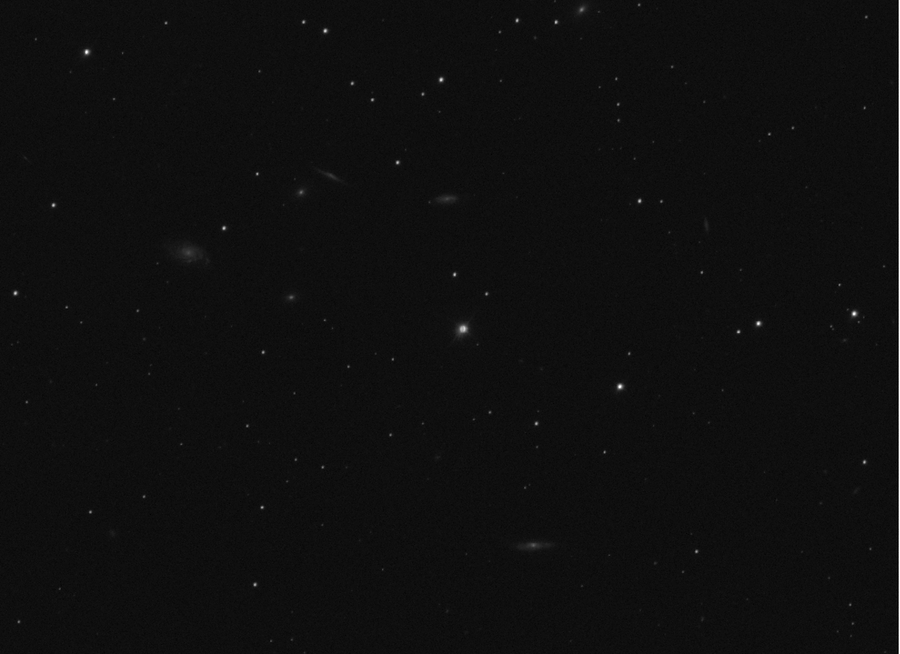
GREEN
In many cases, these images would have to be manually combined and colorized. Fortunately, SDSS also provides a pre-processed image, that combines all 3 visible wavelengths (near-infrared, red, and and green). These images are available in as jpegs, and while the quality may be slightly degraded due to jpeg compression, we chose to use these pre-processed images as it made the image downloading process much easier. Otherwise, we would have needed to download 3 times as many files and write a program to automatically combine and process them.
While downloading the images and data files was a fairly straightforward process, trying to cut out the individual galaxies from the tile was not. SDSS attempts to catalog every object in a tile, and indicates whether it is a star or a galaxy. Another volunteer, Stefan Jeglinski, created a plugin for ImageJ, a popular image processing program, that would perform edge detection on any large objects in an image. We combined this edge detection with the listed positions of the galaxies in each tile to find any large objects in the tile, then cross-reference their positions with the known galaxy positions. If they matched, we would cut that region out of the tile.
Once we had the galaxy cutout, it was tagged with the positional data from the SDSS data files. Additionally, the galaxy’s distance from earth was calculated using the redshift data, and the size of the galaxy was calculated angular width and the distance. All of this data was tagged on the galaxy cutouts so that it could be used for later processing.
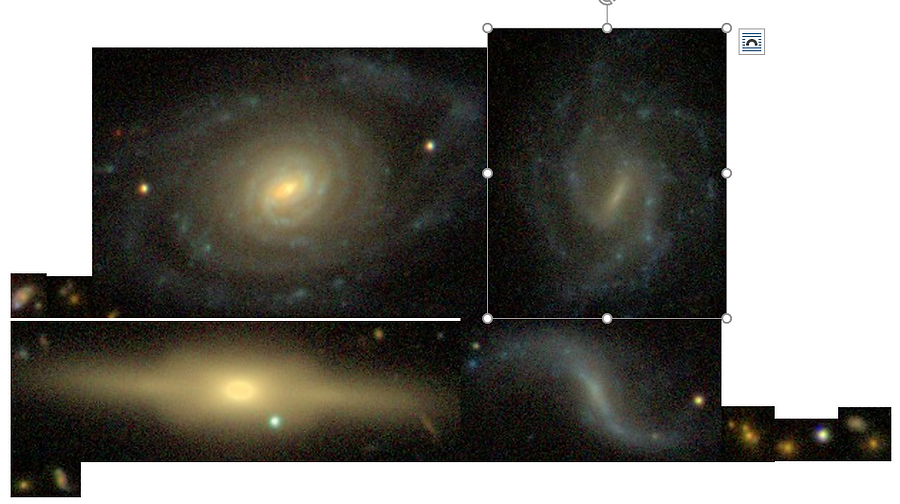
Just a few of the 5 million cutouts
The actual downloading and processing was split between several volunteers over several weeks. When all was said and done, we had over 5.5 million individual files. Unfortunately, once we started combining all of these images and creating some test shots with them, we realized we might have a problem; while most of the images looked great, the process wasn’t perfect. Sometimes, stars would get cut out, or the edges would be detected along with a small galaxy. Very bright stars would overexpose the camera and distort the image. In other images, an airplane was photographed or the image would get corrupted.
We tried to come up with ways to detect these bad images, but writing a program to do this would have taken time, and wasn’t guaranteed to catch everything. Stephen realized what had to be done: he would have to go through all of these images himself. The cleanup would end up taking several months, but he was able to get through all 5.5 million cutouts and remove nearly all of the incorrectly tagged, corrupt, or incomplete cutouts.
While Stephen started his monumental task of cleaning these images up, we still had other work to do. Now that we had over 5 million images, we had to come up with a way of pulling these into Adobe After Effects. As I quickly learned, After Effects was designed for animating through hundreds of layers, not millions. If we wanted to use all of these galaxies, we couldn’t use every individual one in their own layer, but would have to represent them in a different way.
The solution for this was twofold:
1. Put most of the distant galaxies into background image tiles
2. Use a particle system to place the remainder of the galaxies
2. Use a particle system to place the remainder of the galaxies
Since most of the galaxies are so far away from the camera that we’d never see them up close, we decided to flatten the 4 million most distant galaxies into 10 layers. We would group the galaxies by distance, and then place each group into giant tiles. The layers would be 100,000 pixels by 50,000 pixels, or nearly 5 gigapixels! Each layer is broken down into 50 tiles of 10,000 pixels by 10,000 pixels. These tiles would be stretched into a sphere and placed around the camera, as if an observer were in a giant planetarium.
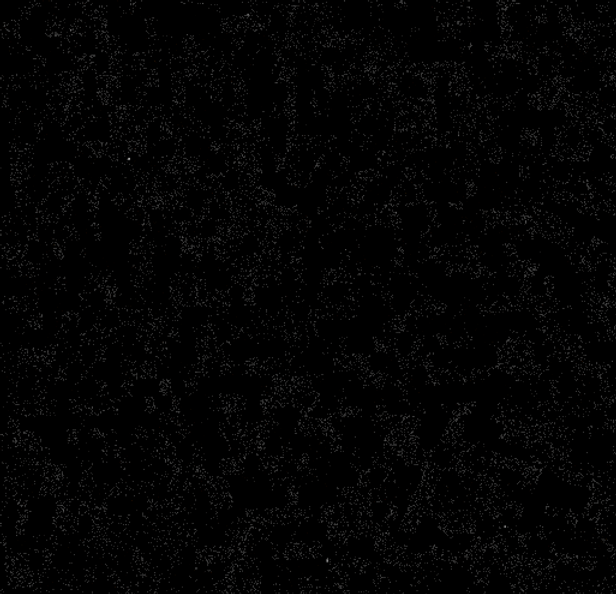
A small section of a tile. The empty spaces are sections where there was no SDSS data available
Even with the tiles, there were still more than a million galaxies to insert into the foreground, far too many to deal with using traditional means in After Effects. The workaround for this was to render these with a particle system. Normally, particle systems are used to render effects like fire or explosions that contain thousands or even millions of individual particles but Stephen had the ingenious idea of generating a particle for every single galaxy and locking it in place so it didn’t move. We tested this out, and it worked! Instead of a million individual layers, we were now able to use only about a dozen!
The next challenge was accurately placing and sizing the particles. Getting the particles in the right spot was pretty straightforward, since all of our cutouts were already tagged with their positions, we were able to translate those directly into coordinates for the particles. Sizing them correctly was more of a challenge.
Here’s a simple version of the problem we were facing: Imagine you have a photo of someone standing in an open field. You want make lifesize print of that photo that you can stand up at the same place where the person was, but you don’t know how tall they are. How do you determine how large to make the print? If you know how far away the person was from the camera, and the angle of view of the lens, you can calculate how tall the original subject was.
On top of this, imagine that instead of putting the printed out image in the same field, you want to build a scale model of the entire scene and print off an image to put into your scale model. You would need to go through the same process as before, but then scale the print down to the same scale as the rest of your model.
In an attempt to explain to Stephen how the scaling needed to work, I drew up this diagram in MS paint:
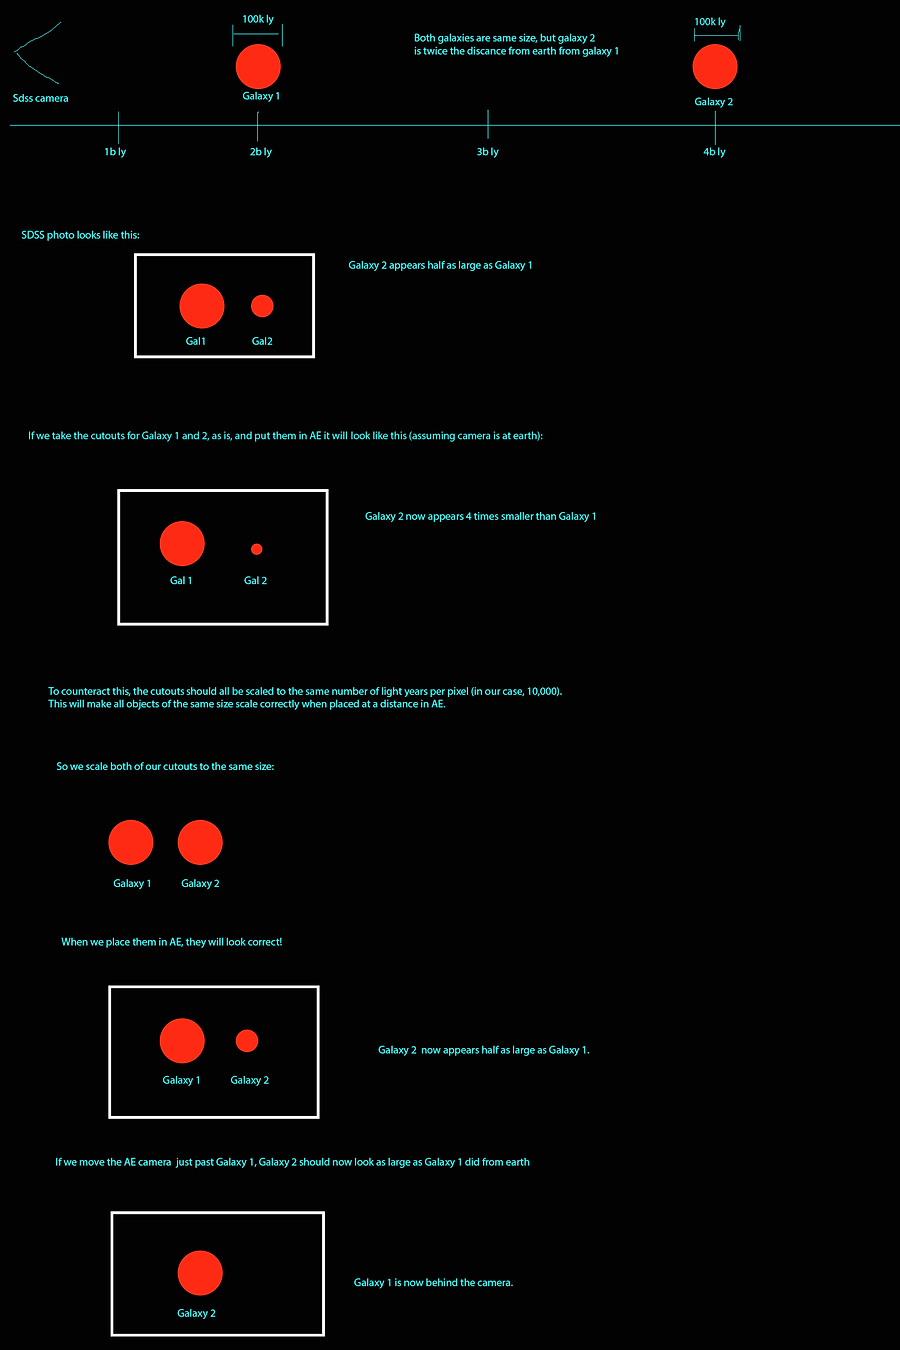
We knew the distance to the galaxies that we had collected, and that the the SDSS camera takes pictures with an angle of 0.396127 arcseconds per pixel. Due to technical limitations in the particle system we used in After Effects, our entire universe had a radius of 100,000 pixels. So we used these values to scale all of our cutouts correctly. A 200,000 pixel-wide universe might sound big, but the furthest galaxy we have images is nearly 8 billion light years away, so 1 pixel represents 78,000 light years! At this scale, most of our cutouts were scaled down to a single pixel or smaller. Fortunately, After Effects can handle particles of this size without losing any visual clarity.
The most terrifying part of the process was not knowing whether this setup would even work with the number of images we had. I had developed the scripts to do the math and create the objects in After Effects on a PC with a reasonably fast processor and 8 GB of memory, which was fast enough for working with subsets of the data, but I wasn’t able to load our entire universe model at once. There was always a possibility that After Effects simply couldn’t handle all of the data even on Stephen’s render machines with big SSD drives and 64 GB of memory, and we would have to go back to the drawing board.
After a bit of tweaking, and a lot of patience, we were finally able to get the first, most complicated scene to load. It takes nearly an entire day to open up the After Effects project, and hours to render a preview frame every time we needed to move the camera, which made actually setting up the shot nearly impossible. To get around this, we build a stripped down version that contained only 5% of the images, chosen at random, to give us a project that we could use to set up the camera movements for the shot while still allowing us to see where the rest of the galaxies would be placed.
Once the camera was set up, we started the renders. Each frame of the 40 second scene took nearly 24 hours to render. The render process finished up in just over half of a month, but it took a combined 5.5 machine years of rendering time across approximately 50 computers, more than half of those provided by volunteers! Finally, we could see what over 3 years of work could create!
Needless to say, we were ecstatic with how the first shot turned out. 5 million galaxies sounds like a big number, but until you see it on screen you don’t realize just how large that really is. On a big screen it’s especially overwhelming, but just imagine how this will look on an IMAX screen up to eight stories tall!
Now that the first, most difficult render is complete, we’re churning away on the rest of the renders. Since the universe is expanding while we’re flying through each shot, galaxies are moving from the foreground particles into the static background layers, which makes each render easier as we go.
It’s been a crazy ride getting to this point, but it’s been fun looking back at this section of the film now that it’s finally almost complete. I’m extremely proud of the work our team has done to bring these scenes to life. If someone had told me how much work these few minutes of film was going to require when I first started this project, I probably wouldn’t have believed them. It turns out that creating a realistic three-dimensional photographic model of the entire universe with 5 million images is a bit harder than I had originally thought!
- Bill Eberly